Introduction – Why You Need a Bootable USB in 2025
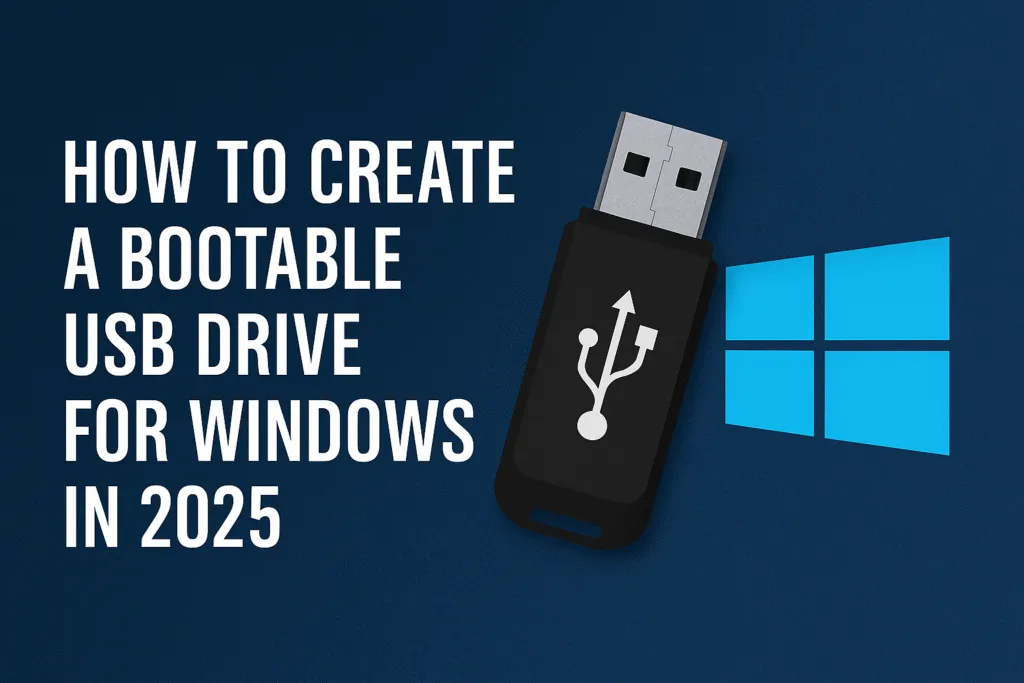
In 2025, having a bootable USB is no longer just a techie trick—it’s an essential tool every computer user should know about. Whether you’re upgrading your system, performing a clean Windows install, or recovering a crashed PC, a bootable USB can save the day. With newer laptops now dropping CD/DVD drives entirely, the USB drive has become the go-to solution for installing operating systems quickly and easily. It’s lightweight, reusable, and works across most modern devices without compatibility issues.
Unlike traditional installation methods, creating a bootable USB lets you carry your Windows setup wherever you go. If your system fails to boot, instead of running to a technician or reinstalling everything from scratch, you can plug in your USB, boot from it, and get back on track within minutes. It’s like carrying a backup plan in your pocket, ready to revive any PC in trouble. This has made it a must-have for students, professionals, and even gamers who often switch between systems or upgrade hardware.
Additionally, with Windows 11’s increasing hardware requirements, many users prefer clean installations to avoid lag or clutter. That’s where a bootable USB becomes invaluable—it ensures a smooth setup process without relying on slow internet connections or pre-installed manufacturer bloatware. It’s also handy when setting up multiple PCs, saving both time and effort.
In short, a bootable USB gives you control, flexibility, and peace of mind. It’s one of the simplest yet most powerful tools in a modern user’s kit. If you’ve never created one before, now’s the perfect time to learn—because in the world of tech, being prepared is everything.
System Requirements and Preparations
Before you start creating a bootable USB, it’s important to check a few basic requirements to avoid running into issues later. First, make sure you have a USB flash drive with at least 8GB of storage space, although 16GB is recommended for smoother performance, especially with Windows 11. The drive should be empty or backed up, as the process will erase all existing data on it.
Next, ensure that the PC you plan to use for creating the bootable USB is running on Windows 10 or newer. This ensures compatibility with tools like Rufus or the official Media Creation Tool. Also, check that your system supports booting from USB—most modern computers do, but it’s worth verifying in the BIOS or UEFI settings.
You’ll also need a stable internet connection to download the Windows ISO file or the Media Creation Tool from Microsoft’s official website. Avoid using pirated or unofficial versions of Windows, as they may contain malware or cause system instability. Make sure you have the correct version of Windows in mind, such as Home, Pro, or Education, based on your license key or intended use.
Finally, disable any background applications like antivirus software temporarily during the process, as they can sometimes interfere with writing data to the USB drive. Keep your laptop or desktop plugged into a power source to prevent unexpected shutdowns during the creation process.
Once these basic checks are done, you’re ready to move forward. These simple preparations help avoid frustrating errors and ensure that your bootable USB will work correctly the first time, saving you time and effort when it matters most.
Best Tools to Create a Bootable USB Drive
Creating a bootable USB drive is easier than ever in 2025, thanks to a range of reliable and user-friendly tools. Whether you’re a beginner or someone who frequently installs operating systems, choosing the right tool makes the process faster and error-free. The best part is, most of these tools are completely free to use and compatible with Windows 10 and Windows 11 systems.
One of the most popular options is Rufus. It’s lightweight, portable, and known for its speed. Rufus is ideal for users who want full control over the formatting and partition options. It supports both legacy BIOS and modern UEFI boot systems, which makes it versatile for all types of PCs.
Another great choice is Microsoft’s official Media Creation Tool. This tool is best suited for users who want a simplified process. It not only helps you download the official Windows ISO but also creates the bootable USB automatically. It’s especially useful for people who want to avoid manual steps or complex settings.
For advanced users or those on Linux systems, balenaEtcher is another solid option. It has a clean, modern interface and supports multiple platforms including Windows, macOS, and Linux. It’s great for flashing various types of OS images beyond just Windows.
Ventoy is also gaining popularity, especially among tech enthusiasts. Instead of creating a new USB every time, you can copy multiple ISO files to the USB and boot from any of them. It’s perfect for those who frequently install different operating systems or work in IT environments.
Choosing the best tool depends on your experience level and specific needs, but any of these options will help you create a reliable bootable USB with minimal hassle.
How to Download the Windows ISO File (Legally)
Downloading the Windows ISO file from a trusted source is the most important step in creating a bootable USB. Using unofficial or pirated ISOs can lead to system errors, malware, and even data theft. Thankfully, Microsoft provides a safe and easy way to download the official Windows ISO files, and it doesn’t cost anything if you already have a valid license.
To start, visit the official Microsoft website. If you’re using a Windows PC, search for “Download Windows ISO Microsoft” or go directly to the Microsoft download page. For Windows 10 and Windows 11, you’ll see an option to use the Media Creation Tool. This tool not only downloads the ISO but can also create the bootable USB automatically. However, if you only want the ISO file, select the option that says “Download ISO file” and choose your Windows version, language, and system architecture (32-bit or 64-bit).
Once selected, the download will begin, and the ISO file will be saved to your computer. Make sure your internet connection is stable as the file size is usually around 5 GB. Store the ISO in a location you can easily access later when using tools like Rufus to create your bootable USB.
If you’re using a Mac or Linux system, Microsoft’s website will directly offer ISO download links without needing the Media Creation Tool. Always double-check the file name and verify the digital signature if possible, to ensure the ISO hasn’t been tampered with.
By downloading the Windows ISO file legally, you ensure a smooth installation process and avoid unnecessary risks. It’s a simple step that guarantees long-term reliability and safety for your bootable USB creation.
Step-by-Step: Create Bootable USB Using Rufus
Creating a bootable USB using Rufus is one of the fastest and most reliable methods available. Rufus is a free and lightweight utility that helps format and create bootable USB drives for Windows installations. Whether you’re installing Windows 10 or Windows 11, Rufus works efficiently and requires no installation. Just follow the steps below to prepare your bootable USB in a hassle-free way.
First, make sure you’ve downloaded the official Windows ISO file and have a USB drive with at least 8GB of storage. Also, ensure your data is backed up from the USB drive, as the process will completely erase its contents. Next, go to the official Rufus website and download the latest version of the tool. Since it’s a portable application, you won’t need to install it—just double-click to launch.
After launching Rufus, insert your USB drive into the computer. Rufus will automatically detect it and show the device in the dropdown menu under “Device.” Now click on the “Select” button to browse and load your Windows ISO file from your computer.
Under the “Boot selection” section, your ISO file name will now appear. Leave the “Partition scheme” to GPT if your PC uses UEFI, which most modern systems do. For older BIOS-based systems, select MBR instead. You can check your system type by going into your BIOS or using system information in Windows. Keep the “File system” as NTFS and “Cluster size” as default unless you have a specific reason to change it.
In the “Volume Label” section, Rufus will auto-fill a name based on the ISO file. You can leave it as it is or rename it. Now that all fields are set, click on the “Start” button. A warning prompt will appear notifying you that all data on the USB will be destroyed—confirm to proceed. Rufus will now begin the formatting process and copy all necessary Windows installation files to your USB drive.
Depending on your system and USB speed, this process may take 5 to 15 minutes. Once completed, you’ll see a “Ready” status, and your bootable USB is now ready to use. You can now close Rufus and safely remove the USB drive. To install Windows on another computer, just plug in your bootable USB, restart the system, and enter the boot menu by pressing the correct key (usually F12, F2, Esc, or Del depending on the manufacturer). From there, select the USB as the boot device, and the Windows installation process will begin.
Using Rufus makes the process of creating a bootable USB fast and efficient, especially for users who want more control over formatting and partition settings. It’s also one of the most reliable tools for advanced users who regularly deal with system setups, reinstallation, or troubleshooting. With just a few clicks, you have a powerful recovery and installation tool in your pocket—one that works smoothly and reliably every time.
Alternative Methods (Command Prompt, Media Creation Tool)
While Rufus is widely used for creating a bootable USB, there are alternative methods that are equally effective—especially if you prefer to avoid third-party tools. Two such methods include using the Command Prompt manually and Microsoft’s official Media Creation Tool. Among the two, the Media Creation Tool is far more user-friendly and reliable for most users, particularly those looking for a simplified and guided experience.
Let’s begin with the Media Creation Tool. This is an official utility provided by Microsoft, specifically designed to help users download the Windows ISO and create a bootable USB without any additional software. It’s completely free and ensures that you’re always using the latest version of Windows, which is ideal if you’re setting up a new PC or reinstalling your system.
To use the Media Creation Tool, visit Microsoft’s official website and download the tool that corresponds to the version of Windows you want to install, such as Windows 10 or Windows 11. Once downloaded, run the application. You’ll be asked whether you want to upgrade your current PC or create installation media for another PC. Select “Create installation media,” and click Next.
Now, choose your preferred language, edition (Home, Pro, etc.), and architecture (64-bit or 32-bit). You can keep the recommended options based on your current PC or change them if needed. On the next screen, choose “USB flash drive” as your media type, then select the connected USB device from the list. The tool will now automatically download the latest ISO file from Microsoft’s servers and create the bootable USB for you. This process takes care of everything—downloading, formatting, and setting up the USB—all in one go. It may take 20–40 minutes depending on your internet speed, but once done, your USB will be ready for installation.
The Media Creation Tool is especially recommended for beginners or those who want a guaranteed, error-free setup. Since it’s maintained by Microsoft, it always includes the most recent updates, patches, and drivers. That makes it an excellent choice for creating a bootable USB without worrying about ISO file integrity or compatibility.
Now, if you prefer a more manual and technical approach, the Command Prompt method is also available. This method involves using the DiskPart utility to manually format the USB, set the partition as active, and then copy the Windows ISO contents onto the drive. It’s useful for advanced users or in cases where third-party software isn’t available.
To begin, open Command Prompt as Administrator. Type diskpart to launch the partitioning tool. Use commands like list disk, select disk, clean, create partition primary, format fs=ntfs quick, and active to prepare the USB. After that, mount the ISO file and copy all files from the mounted drive to the USB manually using the xcopy command. While effective, this method leaves room for error and requires more technical precision.
Between the two, the Media Creation Tool stands out as the best alternative to Rufus for creating a bootable USB. It’s simple, safe, and officially supported—ideal for everyday users who want a straightforward experience without diving into technical details.
How to Boot from USB on Any PC or Laptop
Once you’ve created a bootable USB, the next step is to use it to install or repair Windows on your system. For that, you need to boot your PC or laptop from the USB drive instead of the internal hard disk. This process is simple, but it can vary slightly depending on the device manufacturer and the BIOS or UEFI version. Knowing how to access the boot menu and change boot priority will ensure your system recognizes the bootable USB correctly.
Start by plugging the bootable USB into a USB port on the device you want to boot. Make sure the device is powered off completely. Now power it on and immediately press the key to enter the boot menu. This key is usually displayed on the screen during startup and varies by brand. For example, it’s F12 for Dell, Esc or F9 for HP, F2 or F12 for Lenovo, and F10 or Esc for Asus. If you’re unsure, a quick online search with your laptop model and the term “boot key” can help.
When the boot menu appears, you’ll see a list of available bootable devices. Use the arrow keys to select your USB drive and press Enter. Your system will now start loading files from the bootable USB and begin the Windows installation or repair process.
If your system doesn’t show the USB in the boot menu, you may need to enter the BIOS or UEFI settings to enable USB boot. Restart the device and press the BIOS key—usually Del, F2, or Esc—depending on your system. Once inside the BIOS, look for the Boot or Boot Order tab and move the USB drive to the top of the priority list. Don’t forget to save changes before exiting.
Successfully booting from a USB ensures you can install a fresh copy of Windows or troubleshoot system errors anytime without needing external help. It’s a powerful ability that gives you more control over your device.
Common Errors and Fixes During Bootable USB Creation
Creating a bootable USB is usually a straightforward process, but sometimes unexpected errors can interrupt your progress. Understanding the common issues and their solutions can save you hours of frustration, especially if you’re creating the USB for urgent system recovery or Windows installation.
One of the most frequent problems is the “USB device not recognized” error. This usually happens if the USB port is faulty or the drive isn’t properly inserted. Try reconnecting the drive or switching to a different USB port. If the problem continues, test the USB on another computer to rule out hardware failure.
Another common issue is the “ISO file is invalid or corrupt” message. This occurs when the downloaded Windows ISO file is incomplete or tampered with. Always download the ISO from Microsoft’s official website to avoid such problems. If you already did, try redownloading it using a stable internet connection and avoid using download managers or unofficial mirrors.
Sometimes the USB creation process fails midway or freezes completely. This might be due to background applications like antivirus software interfering with disk operations. Temporarily disable your antivirus and run the bootable USB creation tool as an administrator. Also, ensure your USB drive is not write-protected and has enough free space—at least 8GB is recommended.
If you’re using Rufus and getting errors like “device media is write-protected” or “access is denied,” try formatting the USB drive manually first using Disk Management or DiskPart. Then relaunch Rufus and retry the process. For persistent errors, switching to another tool like the Media Creation Tool might help, as it handles more things automatically.
Finally, users often face problems when the bootable USB doesn’t appear in the boot menu. This could be due to a mismatch between the partition scheme and the system type (MBR vs GPT). Make sure to choose the right partition scheme based on whether your system uses legacy BIOS or UEFI.
By staying aware of these common errors and applying simple fixes, you can ensure a smooth bootable USB creation experience every time.
How to Test If the USB Drive Is Bootable
After creating a bootable USB, it’s important to verify whether it actually works before relying on it for a Windows installation or system recovery. A non-working drive can waste your time or leave you stuck during emergencies. Testing the bootable USB ensures it’s correctly set up and ready when you need it most.
The easiest way to test the bootable USB is by using another computer or the same one where you plan to install Windows. Plug the USB into a port, restart the system, and enter the boot menu by pressing the required key—usually F12, F2, Esc, or Del depending on your PC brand. Once the boot menu appears, select your USB drive from the list. If the system begins loading the Windows setup screen, your bootable USB is working correctly. You can power off the device at this point if you’re just testing and don’t want to proceed with installation.
If you’re unable to access another PC or don’t want to reboot every time, you can use software like VirtualBox or QEMU to simulate booting from your USB in a virtual environment. These tools allow you to launch the USB image in a virtual machine and see if the setup process begins. It’s a fast and safe method to verify bootability without touching your actual system files.
You can also run basic checks in Windows. Open File Explorer, navigate to the USB, and ensure it contains key files like “setup.exe” and folders like “boot” and “sources.” These are part of the Windows installation package and must be present. If the drive looks empty or the files seem missing, the creation process likely failed and you should reformat and try again.
By taking a few minutes to test your bootable USB, you can avoid future headaches and be confident that your tool will work when it matters.
Conclusion – Ready to Install Windows Anytime
Creating a bootable USB may seem like a small task, but it plays a big role when it comes to maintaining, repairing, or reinstalling your Windows system. Whether you’re upgrading your PC, setting up a new one, or facing system failure, having a ready-to-use bootable USB means you’re always prepared. It puts you in control and eliminates the need for technical help in most cases.
With simple tools like Rufus or Microsoft’s Media Creation Tool, the process is now easier than ever. You just need a reliable USB drive, an official Windows ISO, and a few minutes of time. The steps are clear and manageable even for beginners, and the result is a powerful tool you can use anytime. It saves time, adds convenience, and gives you the flexibility to install or repair Windows on any device, anywhere.
What makes it even more valuable in 2025 is the growing shift toward digital setups. Most laptops now come without DVD drives, and downloading Windows every time can be time-consuming. Having a bootable USB ready to go means you don’t have to depend on the internet or tech support. You’ve already got what you need in your pocket.
If you’ve followed the steps, made the necessary checks, and tested your drive, your system is now ready for action. Keep your bootable USB safe and update it occasionally to ensure it stays current with the latest version of Windows. It’s a small investment of time with long-term benefits. Whether you’re an everyday user or a tech enthusiast, having a bootable USB ready means you’ll never be caught off guard again.
Also Read: Two Factor Authentication 2025: Ironclad – Don’t Get Hacked
FAQs – Your Questions Answered
Q1: Can I use any USB drive to create a bootable USB?
You can use most USB flash drives, but it’s recommended to use one with at least 8GB capacity. For smoother performance, especially with Windows 11, a 16GB USB drive is ideal. Make sure it’s empty or you’ve backed up the data, as it will be formatted during the process.
Q2: Is it legal to download Windows ISO from the internet?
Yes, as long as you download the ISO from Microsoft’s official website, it is completely legal. You still need a valid product key to activate Windows after installation, but downloading the file itself is allowed.
Q3: Which is better – Rufus or Media Creation Tool?
Both are excellent tools. Rufus gives more control over formatting and is faster, while the Media Creation Tool is simpler and ideal for beginners. If you want a completely guided and automatic process, go with the Media Creation Tool.
Q4: Can I use the same bootable USB on multiple computers?
Yes, once created, a bootable USB can be used on any compatible system. Just make sure the architecture (32-bit or 64-bit) matches and that Secure Boot or UEFI settings are properly configured on the target machine.
Q5: How do I update my bootable USB with the latest Windows version?
You can’t update a bootable USB directly. Instead, download the latest ISO and repeat the creation process using Rufus or the Media Creation Tool. This ensures your USB contains the most recent updates and features.
Q6: Why isn’t my PC booting from the USB drive?
Check if USB boot is enabled in BIOS/UEFI settings and make sure you’re using the correct boot key during startup. Also, confirm the USB was created properly and is showing up in the boot menu. If not, try using a different port or re-create the bootable USB.
